Getting Started with Success.co
Build clarity on the big picture, break it down into actionable priorities, create a culture of accountability and run better meetings. Success.co has you covered.
New to Success.co? The sections below will help you and your team to get started on Success...successfully!
Sign up
Signing Up for Success.co
Follow these steps to create your Success.co account:
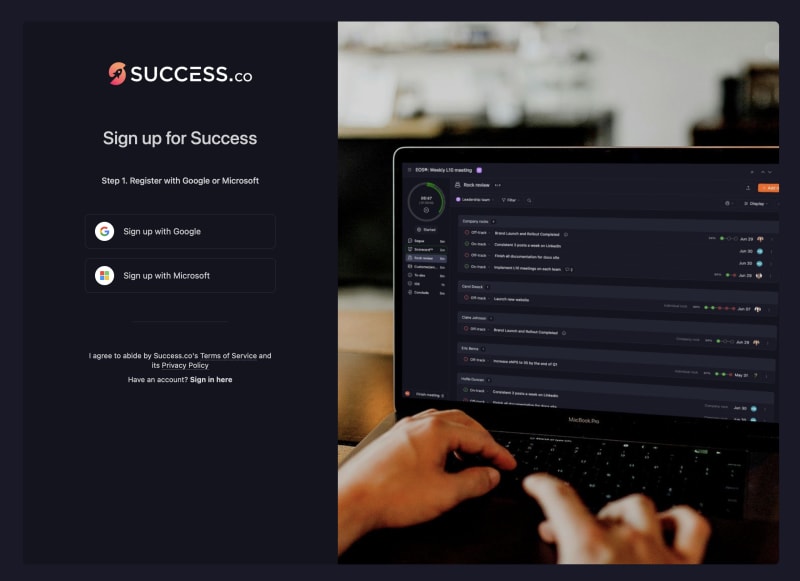
- Open the Success.co sign-up page or visit https://www.success.co/signup.
- Choose how you would like to register:
- Click Sign up with Google to use your Google account.
- Click Sign up with Microsoft to use your Microsoft account.
- Select the Google or Microsoft account/email address you want to use for Success.co.
Login
Sign In to Success.co
- Go to success.co/login.
- Choose your sign-in method:
- Microsoft
- For other options, click Alternative sign in methods, then choose:
- SimpleLogin
- Tenant
- Sign in using the email associated with your Success.co account.
First-Time Login Notes
- Your login email must match the email address that was invited to Success.co.
- No password is created or stored in Success.co when using Google or Microsoft login.

Accessing the Correct Company
- If you are a member of one company, you’ll be logged in directly.
- If you are a member of multiple companies, you have two options:
- Log in using the company-specific URL, or
- Log in via https://www.success.co/login, then click your company name or logo in the top-left corner and select Switch company.

Simple Login
Simple Login is an alternative way to sign in to Success.co using an email address and password, instead of using Google or Microsoft sign-in.
It’s useful in two common scenarios:
- You want to use an alternative email address to access Success.co (instead of your Google or Microsoft work email).
- Your email provider is not Google or Microsoft, so you can’t use those sign-in options.
When to Use Simple Login
Use Simple Login if any of the following apply:
You want to log in with a different email than your Google or Microsoft account
Even if your work email is hosted by Google or Microsoft, you can still choose Simple Login if you prefer to use:
- A different work email
- A shared inbox (if your org uses one)
- A private email address used for Success.co access
Your email is not hosted by Google or Microsoft
If you do not have access to “Sign in with Google” or “Sign in with Microsoft,” Simple Login lets you sign up and log in using email and password.
How to Sign Up Using Simple Login
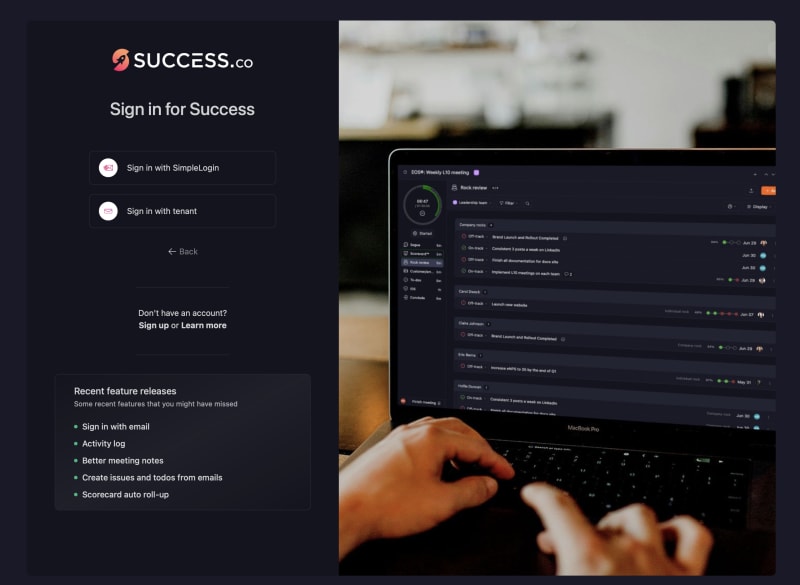
Go to your company’s Success.co URL (or the Success.co login page). Select "Alternative sign in methods"

Select Sign in with SimpleLogin
You will be redirected to a SimpleLogin authorization page.
On this screen, SimpleLogin is asking for permission to share limited account details with Success.co.
You will see two main options:
Login
- Select this if you already have a SimpleLogin account.
- You will be signed in and returned to Success.co.

Sign Up
1. Enter an Email Address
- Enter a valid email address that you control.
- This email will receive messages sent to your SimpleLogin alias.
- The email cannot be a disposable or temporary address.
- SimpleLogin recommends using a Proton Mail address, but this is optional.
2. Create a Password
- Choose a secure password for your SimpleLogin account.
- This password is managed by SimpleLogin, not by Success.co.
3. Verify You’re Human
- Check the “I am human” box and complete the captcha if prompted.
4. Create the Account
- Click Create Account to continue.

Verify Your Email Address
After creating your SimpleLogin account, you’ll see a confirmation message letting you know that a verification email has been sent. Check your email inbox and verify.

After verifying your email, SimpleLogin will ask you to confirm what information Success.co can receive before completing the sign-in.
What You’ll See
On this screen, you’ll be prompted to:
- Select an email address or alias
- Confirm your name
- Allow access so Success.co can complete the login
Important: Select the Correct Email Address
In the Email dropdown, make sure you select the same email address that was invited to Success.co.
This is important because:
- Success.co uses the selected email to identify your user
- Selecting the invited email ensures you are directed to the correct company after login
- Choosing a different alias may prevent you from accessing your company
If you were invited using your real email address, select that email.
If you were invited using a SimpleLogin alias, select that exact alias.
Click allow and you you'll now be Logged in.

Initial screen - Dashboard
Your Dashboard is the one place for all your meetings, rocks, measurables, headlines and to-dos. You can customize the layout and toggle on the sections you'd like to view.

Setting up your teams
Set up your teams within seconds. Teams are important since the filtering and some visibility for users in Success.co are based on them.
Go to the Teams option in the sidebar. Click the Add team button. Give your new team a name, add an optional description and choose the colour you would like this team to show as within the Success.co interface.
Click the Add team button and you will see your team appear in the teams list.

First day of the week
You also need to select the teams first day of the week. Click into the team in the teams list. You will see the First day of the week option on the right hand side. This should be the day the team has their L10 meeting as the teams weekly Scorecard data will start from this date each week and keep their Scorecard data in sync.
This will default to what is set for the companies first day of the week in the companies settings if not set for the team.

Add users
To add users, go to the People option in the sidebar, then click the Add people button.
Complete the user information:
- First name: required
- Last name: required
- Email: required
- Job title: optional
- Team: required
- Permission: required
- Color: select a color for the user
- Send invite: choose whether to send an invitation email to the user
Once all the information has been entered, click + Add user.

Adding users with special permissions
When adding a user with Implementer, Practice Manager, or IT Admin permission, you will have the option to click the X next to the selected Team to remove the team assignment.
This option is only available for users with Implementer, Practice Manager, or IT Admin permission.

Permissions
Success.co offers various user permission levels. The differences between them affect things like the visibility of certain features or what actions the user can perform.
Owners
Full admin access.
Admins
Full admin access but can’t delete the company.
Access to the Insights & People Analyzer.
Implementer & Practice Manager
Same as Admin role, but can’t be assigned ownership on items.
Access to the Implementer Hub & People Analyzer.
IT Admin
Can access company settings, integrations, and user/team administration.
No access to team content or people data.
Managers
Can create and manage teams they are assigned to.
Access to the People Analyzer.
Team member
Can create and manage items within their assigned teams only.
Observer
Read-only access to items within their assigned teams.
Cannot be assigned ownership of work items.
Can be assessed in the People Analyzer or added to a seat in the Accountability Chart.

Teams
You can then select which teams you want this user to be a part of, turn on the Choose Multiple button at the bottom of the team dropdown if you want to add a user to multiple teams. They are automatically added to the Leadership team as default. So don't forget to delete this option if you don't want them in the Leadership team.

Invite users
The invite toggle is set to on by default. This will send the user an invite email when you click the Add user button. If you want to hold off on sending the Invite you can turn the toggle off and send out the email invite later.
In the list of users you will see an invite user button on the right hand side for any user that hasn't been invited yet. You can click this to send an invite anytime.
Check out the join your team guide for information on the steps your team need to take to join your company in Success.

Settings
Access settings by clicking onto your company logo on the top left.
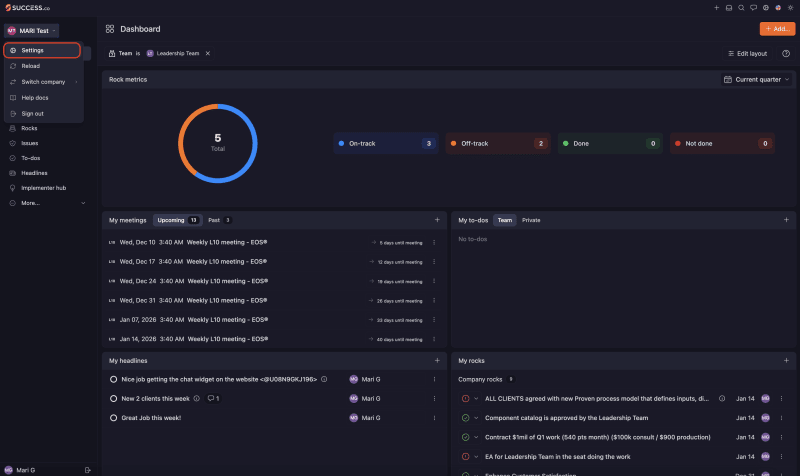
Within settings, you can set your preferences, connected apps, integrations, update default settings for your company, Manage Teams and People, access your billing and the trash can for deleted items if you are have an Admin and an Owner permission.

For Team members and Managers, you can view Preferences, Connected apps, API Keys and Feedback in the Settings.

Data Migration
Are you moving from another platform? If you have data you wish to migrate please get in touch with our team to find out how we can assist.
Next Steps
If you're moving data across with our migrations team we will let you know once this is complete and you're ready to get started with Success.co
If you're starting afresh we recommend you start by:
- Filling out the Leadership team V/TO so you have a strong foundation for your company to work from.
- Complete the Accountability Chart so everyone in your companies position, roles and responsibilities are clear.
- Add your Rocks for the next 90 days.
- Add your measurables to the Scorecard™.
- Schedule your first L10 meeting.
- Run your first L10 meeting with your team and start to add your to-dos, issues and headlines.
If you need any assistance or have any question please don't hesitate to get in touch with our support team.